Wheelchair Users
- What you need
- Hands in Hair
- Key in a lock
- Use of Cutlery
- Buttons or Zips
- Upper Body Dress
- Finger Tap Right
- Make a Fist Right
- Finger Tap Left
- Make a Fist Left
- Hand Steadiness Right
- Hand Steadiness Left
- External Arch Right Seated
- Internal Arch Left Seated
- Ankle Left RoM
- External Arch Left Seated
- Internal Arch Right Seated
- Ankle Right RoM
- Pin Prick
- Journal
What you need
This is what you need for this check-in:
- A CaptureProof account - Sign up here
- A mobile phone with a camera
- A well lit, open area (do not be back lit)
- A helper willing to take videos of you
- Lock and key, like a front door
- A set of cutlery
- Something with buttons and something with a zipper
- A t-shirt or sweater
- Something to tie your hair back if it sits on your shoulders
- Safety pin or paper clip
- Any aids that you typically use
Hands in Hair
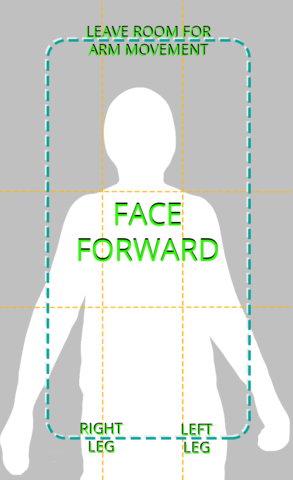
CAMERA VIEW
Hair Washing
Participant:
Mime that you are washing your hair and then use a brush to brush your hair. Do the best that you can and use any aids you would typically use.
Tap the arrow to close the words. Tap the screen to set focus
Key in a lock
CAMERA VIEW
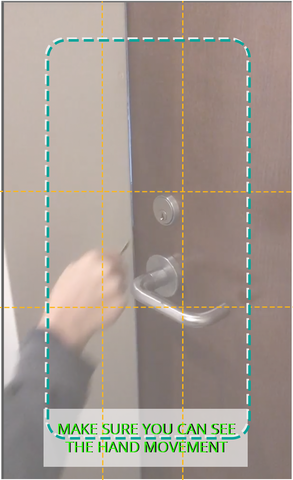
Turn the key in the lock to both lock and unlock the door. Do the best that you can and use any aids you would typically use.
Tap the arrow to close the words. Tap the screen to set focus
Use of Cutlery
CAMERA VIEW
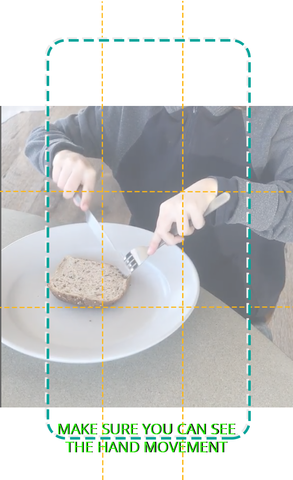
Show how you use a fork and a knife. If you do not use a knife and fork, your usual eating implements should be substituted (e.g. chopsticks). Do the best that you can and use any aids you would typically use.
Tap the arrow to close the words. Tap the screen to set focus
Buttons or Zips
CAMERA VIEW
Do or undo Buttons or Zips on a shirt or jacket. Do the best that you can and use any aids you would typically use.
Tap the arrow to close the words. Tap the screen to set focus
Upper Body Dress
CAMERA VIEW
Put on a sweater or a t-shirt on over your head. Do the best that you can and use any aids you would typically use.
Tap the arrow to close the words. Tap the screen to set focus
Finger Tap Right
CAMERA VIEW
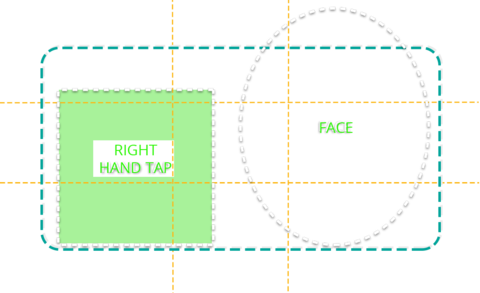
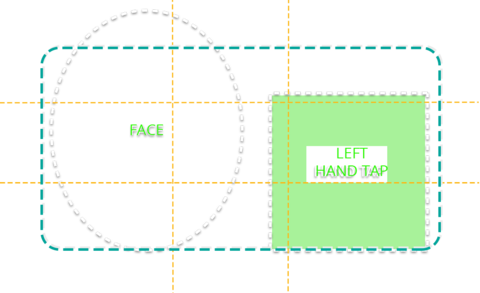
Line up to the overlay. Hold RIGHT hand next to face and have the palm face directly to the camera. Tap each Fingers to your thumb.
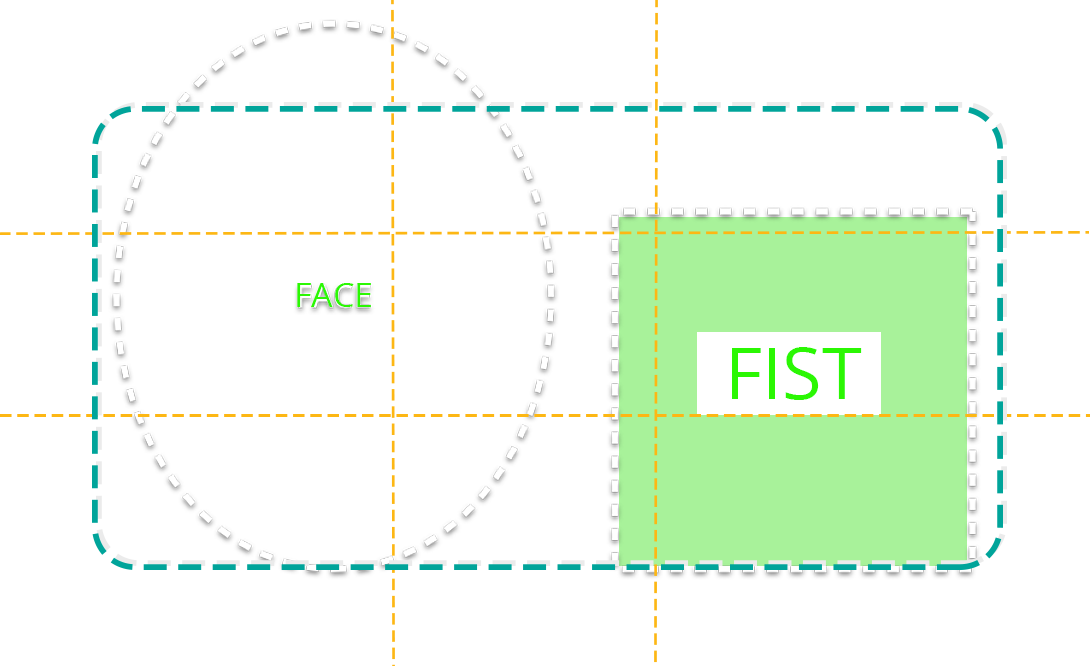
Make a Fist Right
CAMERA VIEW
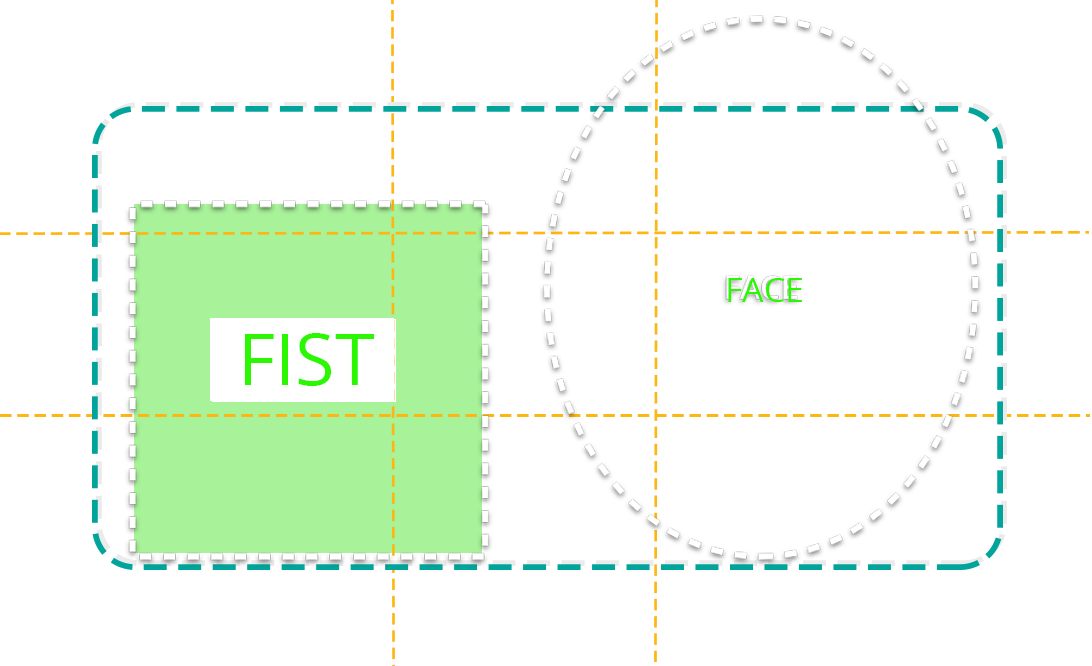
Line up to the overlay. Hold your right hand up beside your head and open and close your hand fully three times. Make the tightest fist you are able to do. If you can not make a fist do the best you can.
Finger Tap Left
CAMERA VIEW
Line up to the overlay. Hold RIGHT hand next to face and have the palm face directly to the camera. Tap each Fingers to your thumb.
Make a Fist Left
CAMERA VIEW
Line up to the overlay. Hold your left hand up beside your head and open and close your hand fully three times. Make the tightest fist you are able to do. If you can not make a fist do the best you can.
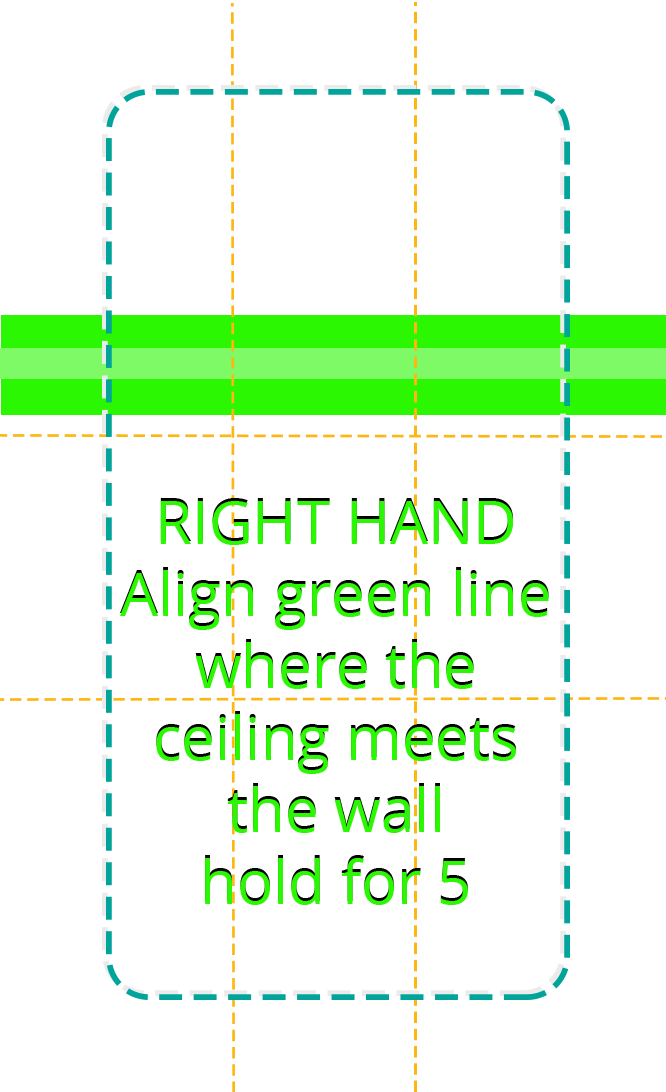
Hand Steadiness Right
CAMERA VIEW
INSTRUCTIONS:
Holding the phone with your right hand, match up the green line on the screen to the line on your ceiling where the wall meets the ceiling. Press record with your left hand and hold steady for 5 seconds.
Be sure to have a clean background and good light.
Hand Steadiness Left
CAMERA VIEW
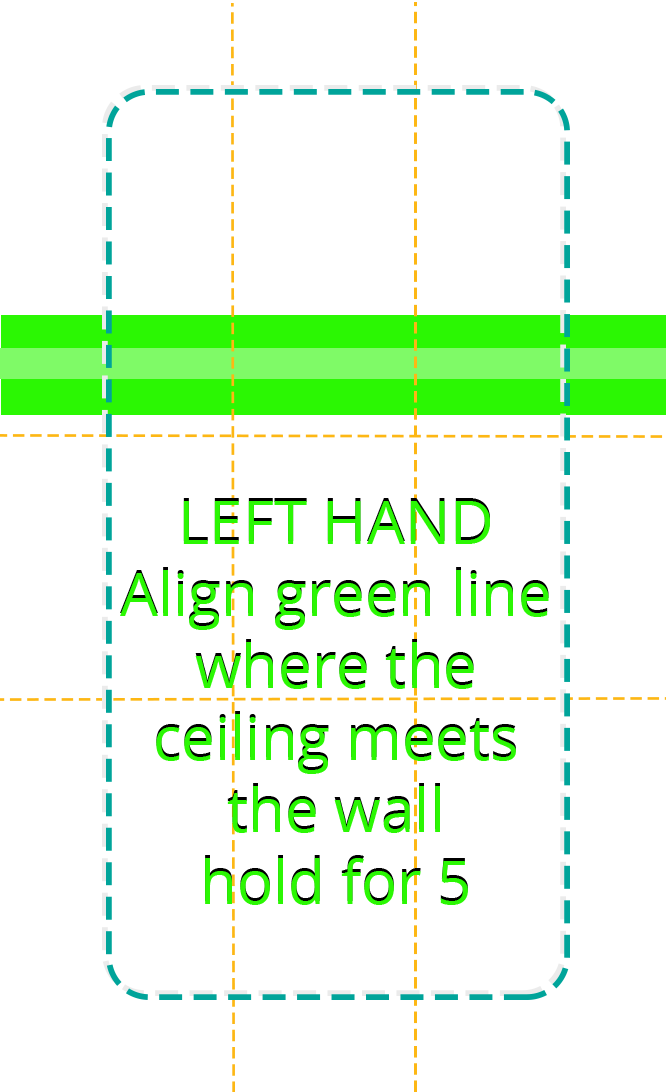
INSTRUCTIONS:
Holding the phone with your left hand, match up the green line on the screen to the line on your ceiling where the wall meets the ceiling. Press record with your right hand and hold steady for 5 seconds.
Be sure to have a clean background and good light.
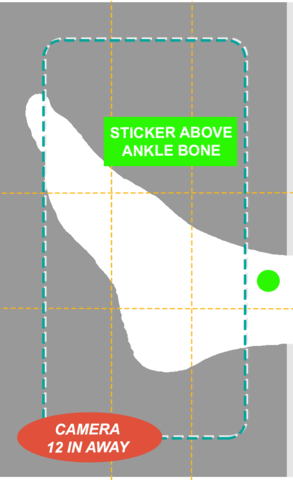
External Arch Right Seated
CAMERA VIEW
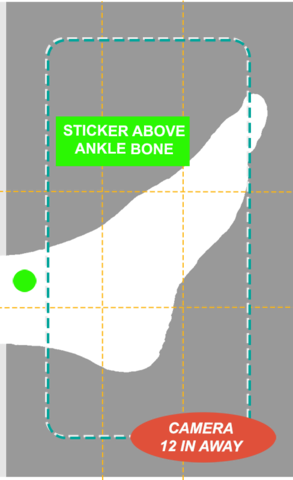
CAMERA - SET UP:
Camera 12 inches or more from the leg. Take a picture with a small space in front and behind the foot. Be sure to have clean background, good light and get the entire foot in view.
Participant:
Please sit and show the RIGHT foot so that the outside arch can be photographed. Arch near your little toe.
Internal Arch Left Seated
CAMERA VIEW
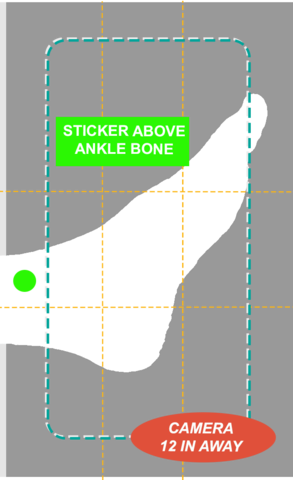
CAMERA - SET UP:
Camera 12 inches or more from the leg. Take a picture with a small space in front and behind the foot. Be sure to have clean background, good light and get the entire foot in view.
Participant:
Please sit and show the LEFT foot so that the INSIDE arch can be photographed. Arch near your big toe.
Ankle Left RoM
CAMERA VIEW
FRAME side view, Sitting in a chair.
Participant:
INSTRUCTIONS do each 3 times.
(1) lift your LEFT foot off of the floor;
(2) point your toes DOWN toward the floor;
(3) point your toes UP to the ceiling;
(4) point your SIDE -TO-SIDE;
(5) rotate toes in a CIRCLE moving ankle one direction then the other.
Move as much as possible in each direction.
External Arch Left Seated
CAMERA VIEW

CAMERA - SET UP:
Camera 12 inches or more from the leg. Take a picture with a small space in front and behind the foot. Be sure to have clean background, good light and get the entire foot in view.
Participant:
Please sit and show the LEFT foot so that the outside arch can be photographed. Arch near your little toe.
Internal Arch Right Seated
CAMERA VIEW
CAMERA - SET UP:
Camera 12 inches or more from the leg. Take a picture with a small space in front and behind the foot. Be sure to have clean background, good light and get the entire foot in view.
Participant:
Please sit and show the RIGHT foot so that the INSIDE arch can be photographed. Arch near your big toe.
Ankle Right RoM
CAMERA VIEW
FRAME side view, Sitting in a chair.
Participant:
(1) lift your RIGHT foot off of the floor;
(2) point your toes DOWN toward the floor;
(3) point your toes UP to the ceiling;
(4) point your SIDE -TO-SIDE;
(5) rotate toes in a CIRCLE moving ankle one direction then the other.
Move as much as possible in each direction.
Pin Prick
CAMERA VIEW
CAMERA - SET UP:
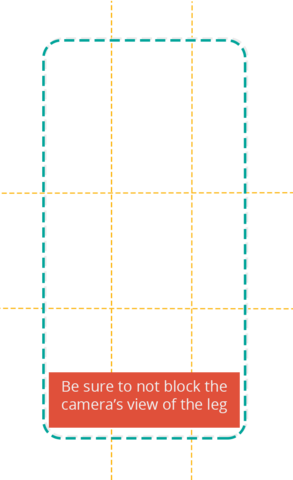
In tripod, make sure not to stand blocking the action.
Participant:
Exposing the skin on the dominant leg (kick a ball?) Using a safety pin you will test the sensation of the leg. Randomly pick the pin side / round side of the pin. At each point tap 3-5 times. Locations to tap, in order: mid thigh; below knee cap; mid shin; either side of ankle bone; inch down foot to big toe.
Journal
CAMERA VIEW
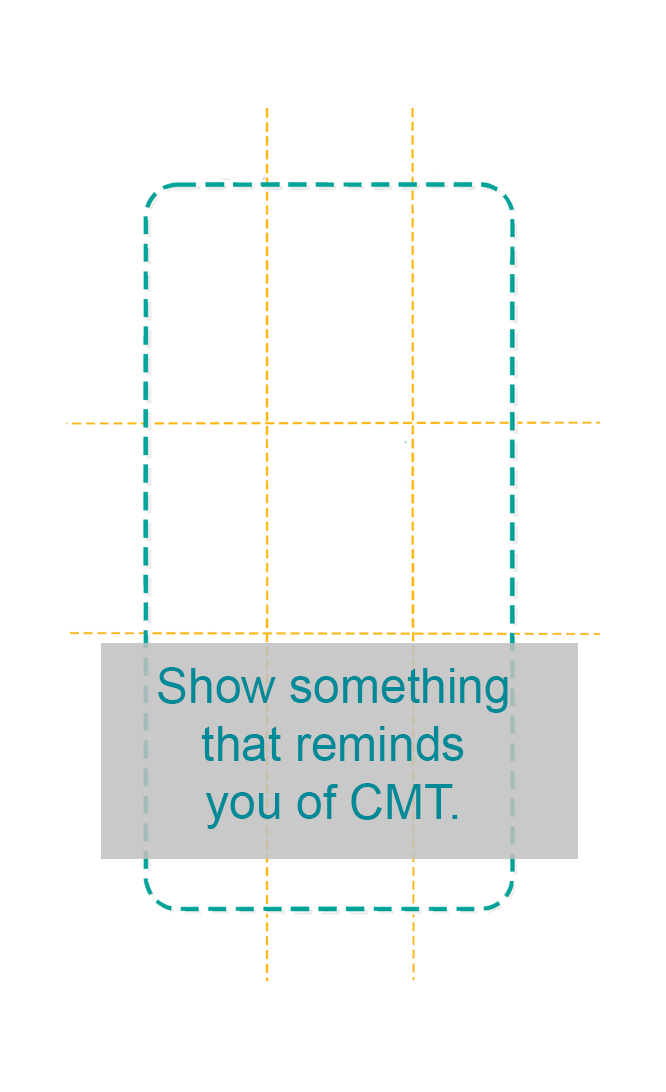
INSTRUCTIONS:
Please tell us any other information about how CMT impacts you and your daily life