Balance Test
Line stand eyes open
CAMERA VIEW
HOW TO VIDEO
CAMERA SET-UP:
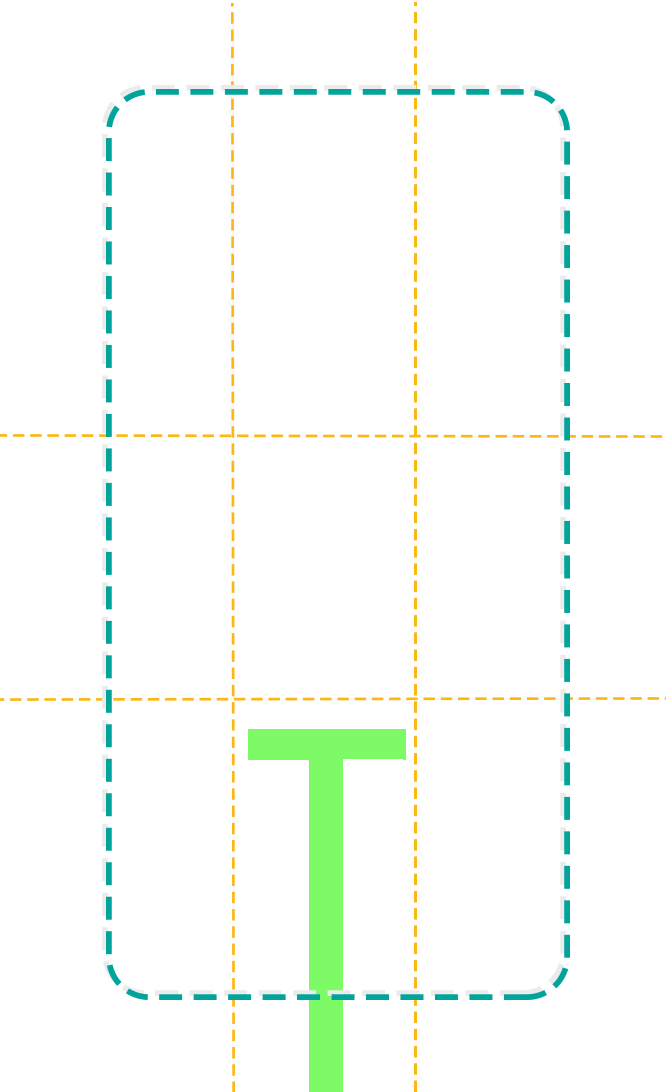
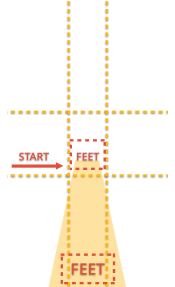
Camera Portrait/Tall in tripod: Line up the line with the T on the floor. Record of 10 seconds. If the patient falls out of pose, please keep filming and ask them to try one more time. Be sure to have a clean background and good light.
PARTICIPANT:
Stand with feet together, dominant foot lengthwise on the line. Place hands on hips. Take one, natural step forward with non-dominant foot lengthwise on the line. Look at the camera and hold until told to stop.
One leg stand eyes open
CAMERA VIEW
HOW TO VIDEO
CAMERA SET-UP:
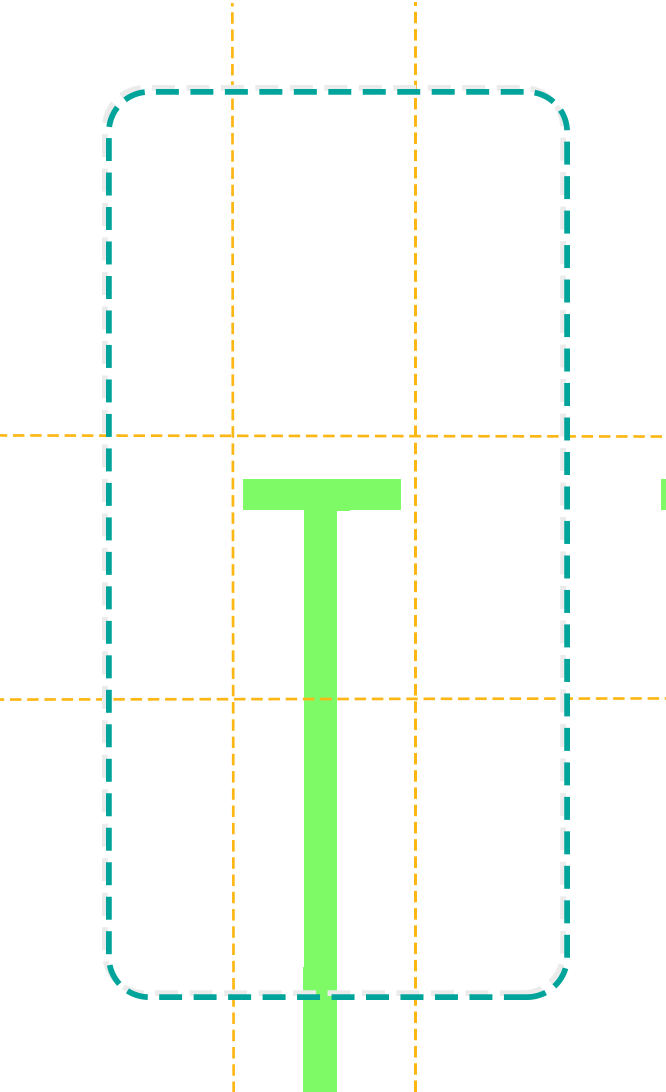
Portrait/Tall in tripod at about shoulder level - Line up the line with the T on the floor. Camera is directly in front of the participant with the entire body is in the frame. Record for 10 seconds. If the participant falls out of pose, please keep filming and ask them to try one more time. Be sure to have a clean background and good light.
PARTICIPANT:
Stand with feet together, dominant foot lengthwise on the line. Place hands on hips. Raise foot of the non-dominant leg, with knee bent at 90º and shin parallel to the floor. Hold and look at the camera until I tell you to stop.
Line stand eyes closed
CAMERA VIEW
HOW TO VIDEO
CAMERA SET-UP:
Portrait/Tall in tripod at about shoulder level - Line up the line with the T on the floor. Camera is directly in front of the participant with the entire body is in the frame. Record for 10 seconds. If the participant falls out of pose, please keep filming and ask them to try one more time. Be sure to have a clean background and good light.
PARTICIPANT:
Stand with feet together, dominant foot lengthwise on the line. Place hands on hips. Take one natural step forward with the non-dominant foot and place it lengthwise on the line. Close your eyes and hold until I tell you to stop.
One leg stand eyes closed
CAMERA VIEW
HOW TO VIDEO
CAMERA-SET UP:
Portrait/Tall in tripod at about shoulder level - Line up the line with the T on the floor. Camera is directly in front of the participant with the entire body is in the frame. Record for 10 seconds. If the participant falls out of pose, please keep filming and ask them to try one more time. Be sure to have a clean background and good light.
PARTICIPANT:
Please stand with feet together, with the dominant foot on the line lengthwise. Place hands on hips. Raise foot of non-dominant leg, with knee bent 90º and shin parallel to floor. Close your eyes and hold until I tell you to stop.
Line walk
CAMERA VIEW
HOW TO VIDEO
CAMERA SET-UP:
Portrait/Tall in tripod at about shoulder level - Line up the line with the T on the floor. Camera is directly in front of the participant with the entire body is in the frame. Record for 6 steps. If the participant can not do 6 steps, please keep filming and ask them to try one more time. Be sure to have a clean background and good light.
PARTICIPANT:
Stand with feet together, dominant foot lengthwise on the line. Place hands on hips. Walk forward on the line in a natural walking stride, placing feet lengthwise on the line with each step.
Line walk heel to toe
CAMERA VIEW
HOW TO VIDEO
CAMERA-SET UP:
Portrait/Tall in tripod at about shoulder level - Line up the line with the T on the floor. Camera is directly in front of the participant with the entire body is in the frame. Record for 6 steps. If the participant can not do 6 steps, please keep filming and ask them to try one more time. Be sure to have a clean background and good light.
PARTICIPANT:
Please stand with feet together, dominant foot lengthwise on the line. Place hands on hips. Walk forward on the line, toe-to-heel, placing feet lengthwise on the line with each step as close to the foot on the line as possible.
Time up and go
CAMERA VIEW
HOW TO VIDEO
CAMERA SET-UP:
Portrait/Tall in tripod at about shoulder level - Line up the line with the T on the floor. Camera is directly in front of the participant with the entire body is in the frame. Record from sit to stand to walking for 10 steps and then return to seated. If they are not able to complete 10 steps ask them to try one more time. Be sure to have a clean background and good light.
PARTICIPANT:
Sit in a chair, approximately 12-15 feet from and facing the camera. Stand up from the seated position (without using your hands, if possible), gain your balance and then walk 10 steps toward the camera. Turn around and return to the chair and sit down.
Heel walking
CAMERA VIEW
HOW TO VIDEO
CAMERA SET-UP:
Portrait/Tall in tripod at about shoulder level - Line up the line with the T on the floor. Camera is directly in front of the participant with the entire body is in the frame. Record heel walking for 10 steps and then return to start position walking normally. If they are not able to complete 10 steps keep filming and ask them to try one more time. Be sure to have a clean background and good light.
PARTICIPANT:
Walk toward the camera on your heels with your toes pointed toward the ceiling for 10 steps and then return to the starting position walking normally.
Gait analysis
CAMERA VIEW
HOW TO VIDEO
CAMERA SET-UP:
Portrait/Tall in tripod at about shoulder level - Line up the line with the T on the floor. Camera is directly in front of the participant with the entire body is in the frame. Record participant walking normally for 6 steps, pause with both feet and both shoulders in the frame, turn and walk back to starting position, then turn to the camera. If they are not able to complete 6 steps or if both feet aren’t in frame during pause, ask them to try one more time. Be sure to have a clean background and good light.
It is important to have both shoulders and feet in the frame for the analysis to run smoothly. If this doesn’t happen, no problem, just redo the filming please.
PARTICIPANT:
With reflectors on front of shoes as if you were kicking a door, walk toward the camera normally for 6-8 steps and then pause, with feet in the frame then return to the starting position walking normally.
Star balance
CAMERA VIEW
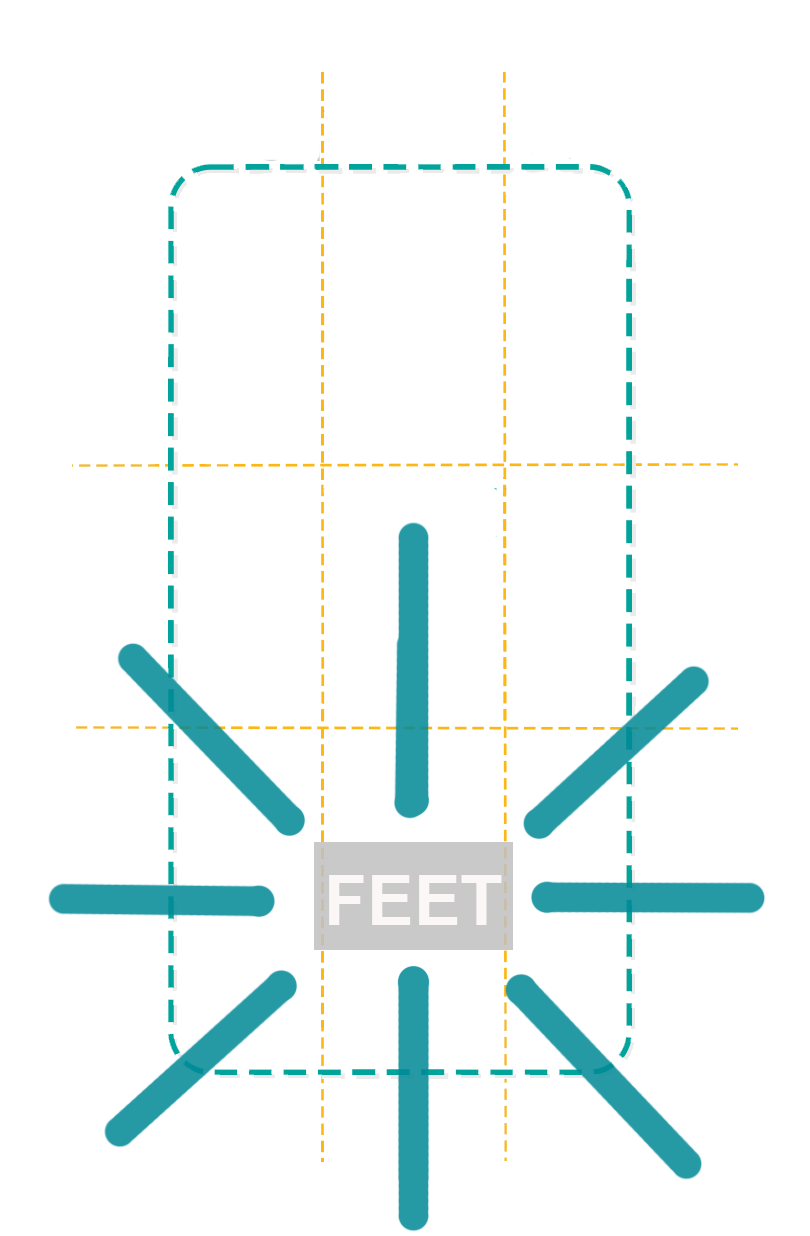
HOW TO VIDEO
INSTRUCTIONS:
Camera is Tall - show the standing patient in frame: head to toe. If you have a tripod, use it please. You can use painters tape to put an 8 point star on the ground to match the overlay.
1. Standing on the surgical leg.
2. Move the non-surgical leg TAPPING at 45º increments from front to back.
If the Right leg is the non-surgical leg, tap the right toes on 1,2,3,4,5.
If the Left leg is the non-surgical leg, tap the left toes on 1,8,7,6,5.